From Prep to Ridge Cap: Shingling Your Roof the Right Way
Nail It Right the First Time: Your Step-by-Step Roof Shingling Guide
Wondering if you can really shingle your own roof without messing it up? Not sure where to start—or what could go wrong if you don't follow the steps exactly?
This guide walks you through what you need to know about shingling a roof, from prepping the surface to laying the final ridge cap.
By the end, you'll understand the process, avoid rookie mistakes, and feel more confident tackling your roof like a pro (or know if you want to hire a pro roofing contractor).
How to Shingle a Roof (Step-by-Step)
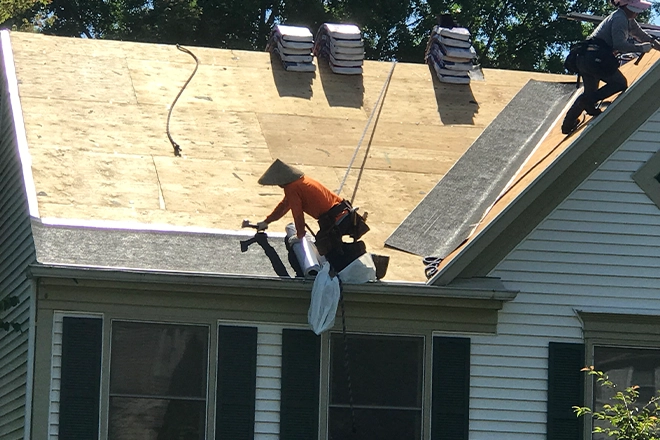
Installing a roof shingle system isn't just about nailing shingles to a surface. It's about layering materials correctly, following safety practices, and using precise layout techniques to ensure your roof is sealed against wind-driven rain, snow, and leaks.
Here are the essential steps to follow when learning how to shingle a roof:
- Install the drip edge along the eaves
- Lay down roofing underlayment or felt paper
- Install starter shingles along the bottom edge
- Apply the first course of shingles using a chalk line as a guide
- Stagger and install subsequent rows, maintaining a consistent 5" reveal
- Nail shingles per manufacturer guidelines, avoiding over- or under-driving
- Add flashing around chimneys, vents, and valleys
- Install ridge cap shingles to finish the roof
This is the bare minimum for shingling a roof. With Clifton Exteriors, you also get:
- A perimeter drip edge (not just at the eaves).
- An ice and water shield at the starter course and the valleys.
- Most roofs need a ridge vent.
- If the roof does not have a ridge vent, we will add one.
- An inspection for plywood rot, with replacements made where necessary.
Safety and Preparation Checklist
Before you begin any roofing work, it's critical to prepare the site and ensure proper safety measures are in place. Roofing projects involve risks, especially on steep slopes and older structures.
Safety Gear
Use fall arrest systems such as harnesses and anchors when working on an asphalt shingle roof. Wear slip-resistant boots and protective equipment like gloves and safety glasses.
Never do roofing work alone—having a partner on-site is essential for both efficiency and safety.
Jobsite Prep Tips
- Move vehicles and fragile lawn items away from the house.
- Cover landscaping and HVAC units with tarps to protect them from falling debris.
- Identify outdoor power sources, prep attic airflow, and clear access for tools and materials.
This preparation also allows you to keep gutters and downspouts clean during the job.
Install the Drip Edge Along the Eaves
Installing drip edge is the first critical step. It helps direct water away from the roof deck and fascia, protecting the wood structure and preventing damage to the exterior.
Start at the eaves by laying drip-edge metal flush against the bottom edge of the roof.
Nail it into place using roofing nails every 12 to 16 inches.
Be sure to overlap sections by at least two inches.
When installing the drip edge along the gables, place it over the underlayment. At the eaves, place it underneath.
Lay Down Roofing Underlayment or Felt Paper
Underlayment adds a water-resistant barrier between the shingles and the wood deck. It helps prevent leaks during heavy rain and is required for proper asphalt shingle installation.
Begin laying underlayment at the eaves and roll it upward toward the ridge.
Overlap each row by at least two inches.
Use cap nails or staples to fasten it securely.
For cold climates, a self-adhering membrane may be used at the roof's edge for added protection against ice dams.
Install Starter Shingles Along the Bottom Edge
Starter shingles create a watertight seal at the eaves. Without them, wind can lift the edges of the first row of shingles, exposing nail heads and causing leaks.
Align the starter strip with the drip edge and attach it with nails just above the adhesive strip.
The starter course should extend slightly beyond the bottom edge to direct water away.
Stagger seams from those in the shingle courses above for enhanced durability.
Apply the First Course of Shingles Using a Chalk Line
Use chalk lines to ensure straight shingle rows and even exposure.
Mark a horizontal line 12 inches from the eave for the first course and additional lines every 5 inches above that.
Place the first shingle so its bottom edge aligns with the overhang of the starter strip.
Maintain a 1/2-inch overhang past the drip edge for proper water runoff.
Nail just below the adhesive strip using the recommended number of nails per shingle.
Stagger and Install Subsequent Rows, Maintaining a Consistent 5" Reveal
To avoid aligned vertical joints and exposed nail heads, stagger each row of shingles.
Start each course with a shingle trimmed to a different length.
Use chalk lines to maintain consistent exposure across the entire roof. This ensures complete coverage and enhances the visual appeal.
For architectural shingles, follow manufacturer-specific layout instructions.
Nail Shingles Per Manufacturer Guidelines
Proper nailing is essential to prevent leaks and maintain the integrity of your asphalt shingle system. Use the correct number of nails per shingle. It's typically four, but can be six in high-wind zones.
Nails should be driven flush with the shingle surface and positioned just below the sealant strip. Avoid overdriven or underdriven nails.
Misplaced nail heads can void warranties and lead to moisture intrusion.
Add Flashing Around Chimneys, Vents, and Valleys
Flashing protects vulnerable roof joints where water tends to collect. Use metal flashing in valleys and around roof penetrations to prevent leaks.
Install step flashing along the sides of chimneys and skylights.
Use roofing cement to seal edges and add counter-flashing on masonry chimneys.
In valleys, either weave shingles or install a continuous metal flashing strip, depending on the roofing project.
Install Ridge Cap Shingles to Finish the Roof
Ridge cap shingles provide the final seal at the highest point of the roof. These specialized shingles are thicker and designed to resist wind and water intrusion.
Begin at one side of the ridge and overlap each piece over the last.
Secure them with nails placed just below the overlap.
Ridge cap shingles made by high-end manufacturers often offer a perfect match to your field shingles for a seamless look.
When to Call a Professional
While DIY roofing is possible for some homeowners, certain situations demand the expertise of a pro.
Steep or multi-story roofs increase the risk of falls and injury. A licensed roofer can handle these challenges safely.
If the roof deck has rotten areas or if flashing around penetrations is complex, a professional evaluation is critical. Experienced contractors can spot hidden issues and provide long-term solutions.
Many roofing systems require certified installation to uphold the warranty.
DIY errors can result in denied coverage and costly repairs down the road.
From Shingles to Satisfaction: Clifton Exteriors Has Your Virginia Home Covered
From removing worn-out shingles to expertly installing a brand-new asphalt shingle roof, Clifton Exteriors delivers precision and quality on every Virginia roofing project. Our team uses durable materials and time-tested techniques to ensure your new roof protects your home for years to come.
Want a roofing upgrade that stands the test of time and weather? Fill out our contact form today, or give us a call.