Why Flashing Is the Real MVP of Roof Protection
What Your Roof Can't Do Without
Ever wondered how water doesn't just pour through the cracks where your roof meets your chimney or walls? Curious what stops leaks before they even start?
In this post, you'll learn the answer to "What is roof flashing?", why it matters, what types exist, and how it gets installed.
By the end, you'll know how this simple piece of metal saves your home from major water damage and expensive repairs (and why it's part of your roof replacement).
What is Flashing on a Roof?
Roof flashing is thin metal installed at roof intersections to prevent water leaks. It redirects water away from vulnerable areas like chimneys, vents, and skylights, protecting the roof structure. Without flashing, water can seep into cracks, causing rot, mold, and structural damage, especially in wet climates.
Contact us today about your roof replacement.
Why Roof Flashing Matters
Roof flashing is one of the most important parts of your roof system, even though it's easy to overlook. It works quietly in the background to keep water out of places where your shingles alone won't cut it, like around chimneys, walls, skylights, and valleys.
Protects Against Water Damage
Flashing acts as a seal at roof joints, edges, and other spots where water tends to sneak in.
These areas take a beating during storms or snowmelt. Without flashing, even the best roof shingles can't stop water from slipping through seams or behind walls. Over time, that moisture can lead to mold, wood rot, and long-term damage inside your attic or home.
Extends the Life of Your Roof System
A roof isn't just a layer of shingles.
It's a full system of roofing components working together to protect your home.
Flashing plays a big role by keeping water flowing off the roof and into the gutters, rather than letting it soak into the underlayment or wood decking. That added protection helps your roof last longer and saves you from early repairs.
Prevents Expensive Repairs
Leaks from failed or missing flashing don't always show up right away.
Slow drips can quietly cause damage behind the scenes—warping wood, damaging insulation, and staining ceilings over time.
Flashing helps stop those issues before they start, saving you money and hassle in the long run.
Types of Roof Flashing
Each area of your roof has different needs when it comes to water protection. That's why there are several types of roof flashing, all designed to fit specific parts of the roof system. When used correctly, they work together to form a watertight seal around roof penetrations, edges, and junctions.
Step Flashing
Step flashing is used where a sloped roof meets a vertical surface, like a wall or chimney.
It's installed in overlapping pieces, one for each row of shingles, creating a stair-step pattern that directs water away from the joint.
Because each piece works independently, step flashing can flex with the home's movement and temperature changes, making it durable and reliable.
Counter Flashing
Counter flashing is installed over base flashing, usually step flashing, to form a second layer of defense.
It's often embedded into an existing mortar joint in masonry and overlaps the lower flashing to keep water from running behind it. You'll see counter flashing most commonly on chimneys or brick walls where added protection is needed.
Apron Flashing
Apron flashing is shaped like an "L" and is installed at the bottom of vertical structures where they meet the roof.
It covers the transition from vertical to horizontal surfaces, like at the base of a dormer or chimney, to stop water from pooling and soaking in. Apron flashing is often used alongside step or counter flashing in complex roof areas.
Valley Flashing
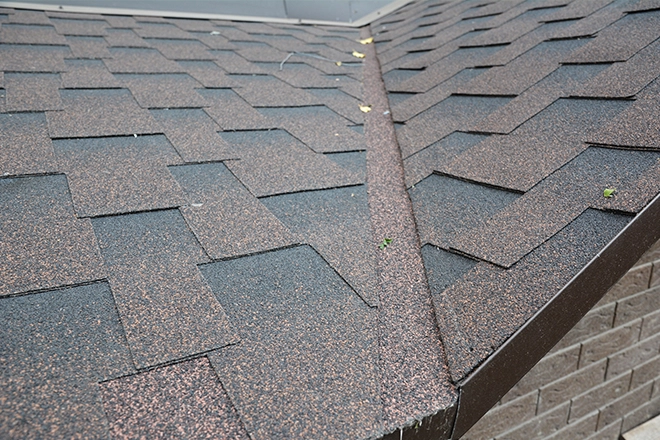
Valley flashing sits in roof valleys, where two roof slopes meet and water tends to collect.
These valleys channel large amounts of water, especially during storms, so they need extra protection. Metal flashing laid in the valley helps guide water off the roof and reduces wear on the shingles in these high-traffic zones.
Kickout Flashing
Kickout flashing is installed at the base of a roof-to-wall intersection, where step flashing ends.
Its job is to redirect water into the gutter instead of letting it run down the siding or behind the wall. Even though it's a small piece, it's critical for protecting walls and preventing hidden water damage.
Chimney Flashing
Chimney flashing is a combination of several types: apron flashing at the front, step flashing along the sides, and counter flashing embedded into the brick.
Sometimes, a small ridge called a cricket is also built behind the chimney to steer water around it.
When installed properly, all these pieces work together to keep water from sneaking in around the chimney base.
Drip Edge Flashing
Drip edge flashing runs along the roof's edge to guide water into the gutters and away from the fascia.
It sits under the shingles and extends slightly over the edge of the roof deck. This helps prevent water from curling underneath the shingles and causing damage to the wood below, especially during heavy rain or snow.
Skylight Flashing
Skylight flashing is designed to create a watertight seal around skylights.
Most skylights come with kits that include continuous flashing for the base and step flashing for the sides. Since skylights are built-in roof penetrations, flashing them correctly is essential to prevent leaks.
Vent Pipe Flashing
Vent pipe flashing surrounds circular openings in the roof where plumbing or exhaust vents stick through.
These flashings usually have a flexible rubber boot attached to a metal base that seals tightly around the pipe and integrates with the shingles. Without it, water can easily drip through the gaps and into your attic.
Flashing Materials
The material your roof flashing is made from affects how long it lasts, how well it holds up to weather, and how much it costs. Some materials are flexible and easy to work with, while others are built to last for decades. The right choice depends on your roof type, climate, and budget.
Galvanized Steel
Galvanized steel is one of the most popular roof flashing materials.
It's strong, relatively affordable, and has a protective zinc coating to keep rust away. You'll often find it used in step flashing, valley flashing, and drip edge flashing.
Over time, especially in coastal or rainy areas, that protective coating can wear off, so it's not the best option for every climate.
Aluminum Flashing
Aluminum flashing is lightweight and easy for roofing contractors to bend and shape on-site.
It's a good pick for areas where flashing needs to be customized, like around skylights or oddly shaped dormers. That said, aluminum can corrode when it comes in contact with pressure-treated wood or certain metals unless it's coated first.
Copper Roof Flashing
Copper roof flashing is a high-end option.
It's strong, corrosion-resistant, and looks great, especially on older homes or higher-end projects. Over time, it develops a natural green patina that protects it from the weather.
It's also one of the longest-lasting materials, which is why it's often used for chimney flashing and skylight flashing, especially on copper roofs.
The main drawback is price—copper costs more upfront but pays off in longevity.
Rubber or Flexible Collars
Used mostly for vent pipes and round roof penetrations, these collars form a tight seal around the pipe.
The rubber top flexes and moves with the pipe while the metal base sits under the shingles. They're not metal flashing, but they're just as important for keeping your roof watertight.
How Roof Flashing Is Installed
Installing roof flashing isn't just about laying metal around the edges. It's all about layering everything correctly so water flows over, not under, each piece. When flashing is installed the right way, it works with the shingles and other roofing materials to guide water down and off the roof.
Step Flashing Installation
Step flashing is installed during the shingle process.
A piece of flashing is placed along the wall, then a shingle is installed over it. The next row does the same thing, overlapping in a staggered "step" pattern. This creates a built-in drainage system that sheds water with every layer. The key is getting the order right—if even one piece is out of place, it can lead to a leak.
Counter Flashing Installation
Counter flashing is added after the base flashing is in.
It's inserted into a groove in the wall or chimney, usually along an existing mortar joint, and then bent over the top edge of the step flashing. This shields the underlying pieces and helps stop water from sneaking behind them. Roofing cement or caulk is usually added for extra sealing.
Chimney Flashing Installation
Flashing a chimney takes multiple steps and multiple types.
First, apron flashing is added to the front, step flashing goes along both sides, and counter flashing caps it off. Some chimneys also get a cricket—a small raised ridge that splits water and sends it around the back of the chimney. Done correctly, all these pieces work together to form a watertight barrier.
Kickout Flashing Installation
Kickout flashing is placed at the base of a roof-to-wall connection, before the step flashing goes in.
It catches water coming off the roof and angles it away from the wall and into the gutter. If it's skipped or installed too flat, water can run behind the siding and cause rot, mold, or staining on the walls.
Skylight Flashing Installation
Most skylights are installed with a specific flashing kit that fits their frame.
These usually include continuous flashing for the bottom, step flashing for each side, and a single piece for the top. The pieces must be integrated into the shingles in layers so water flows away in every direction.
Poor skylight flashing is one of the most common causes of leaks, so this step can't be rushed.
Common Flashing Problems and How to Spot Them
Even the best flashing can run into trouble. Exposure to wind, water, and time wears down materials. If the flashing was installed poorly to begin with, it might fail much sooner than it should.
Rust and Corrosion
Rust is often the first visible sign that it's time to repair roof flashing.
If you see rust around roof valleys, chimneys, or walls, it's likely your galvanized steel flashing is breaking down. Once corrosion starts, it creates gaps where water can sneak through.
Loose or Shifted Flashing
Over time, flashing can shift due to strong wind, temperature changes, or roof settling. When it lifts or pulls away from the roof surface, it breaks the watertight seal and invites water in.
Flashing should always lie flat and tight—if it's bent, raised, or flapping, it needs to be secured or replaced.
Improper Installation
Flashing works because of how it's layered, not just because it's there.
If the flashing isn't tucked under the shingles or sealed correctly with roofing cement, it won't stop leaks. Flashing that was reused during a previous roof replacement or installed without proper overlap can also fail early.
Signs It's Time to Repair or Replace Flashing
Look for stained ceilings, musty attic smells, or water streaks along walls near chimneys or roof edges.
Outside, inspect your flashing for rust, gaps, cracks, or any pieces that appear out of place.
If your home is getting a new roof, make sure your roofing contractor replaces the old flashing rather than reusing it, especially around problem areas like chimneys and roof valleys.
Seal the Deal on Your Roof with Clifton Exteriors
Clifton Exteriors knows how important flashing is to the overall performance of your roof. Whether you're dealing with old, worn-out flashing or planning a full roof replacement in Northern Virginia, our team has the skill to install flashing that lasts.
If you're ready to protect your home from leaks and water damage, we're here to help. Fill out our contact form today or give us a call.